Create a Helm Chart Repository using Github
A Helm Chart Repository is simply a place where Helm Charts are stored and shared. Charts are packages of Kubernetes resource descriptions, i.e., they are the smallest deployable and manageable unit of Helm. A Helm Chart Repository is quite similar to package repositories from other package management systems, such as those used by npm (for Node.js) or apt (for Debian/Ubuntu). Like these, Helm repositories allow sharing applications as packages.
Helm repositories can be either local (hosted on your own infrastructure) or remote (hosted on services like Google Cloud Storage, Amazon S3, GitHub Pages, etc.). These repositories contain chart files, which are typically in tar.gz format, and an ‘index.yaml’ file that contains information about the charts, like what versions are available and where to find them.
Developers and systems operators can search a Helm repository to find existing charts that suit their needs, or they can publish their own charts for others to use.
Helm, the package manager for Kubernetes, allows developers to package, version, and share applications. Helm charts streamline the process of defining, installing, and upgrading complex Kubernetes applications. In this article, we’ll guide you on how to create a Helm chart and host it using GitHub Pages.
Understanding Helm Chart Repositories
Helm chart repositories are used for publishing Helm charts and making them available to a wide community of Helm users. This is conceptually similar to the repositories that are used in Linux package management, such as RPM or Debian repositories, in which packages are installed using tools such as dnf or apt-get. Public Helm chart repositories can be found at Artifact Hub (https://artifacthub.io). A Helm chart repository is created using one of two high-level implementations:
- An HTTP server
- An OCI registry
With Helm Chart Repositories, Kubernetes users have a wide array of existing charts at their fingertips, ready for deployment. Developers can search a repository for the right chart to suit their application requirements. Additionally, these repositories serve as the platform for developers to share their own charts with the wider Kubernetes community, fostering a culture of collaboration and sharing.
A repository that’s been created using an HTTP server must consist of the following components:
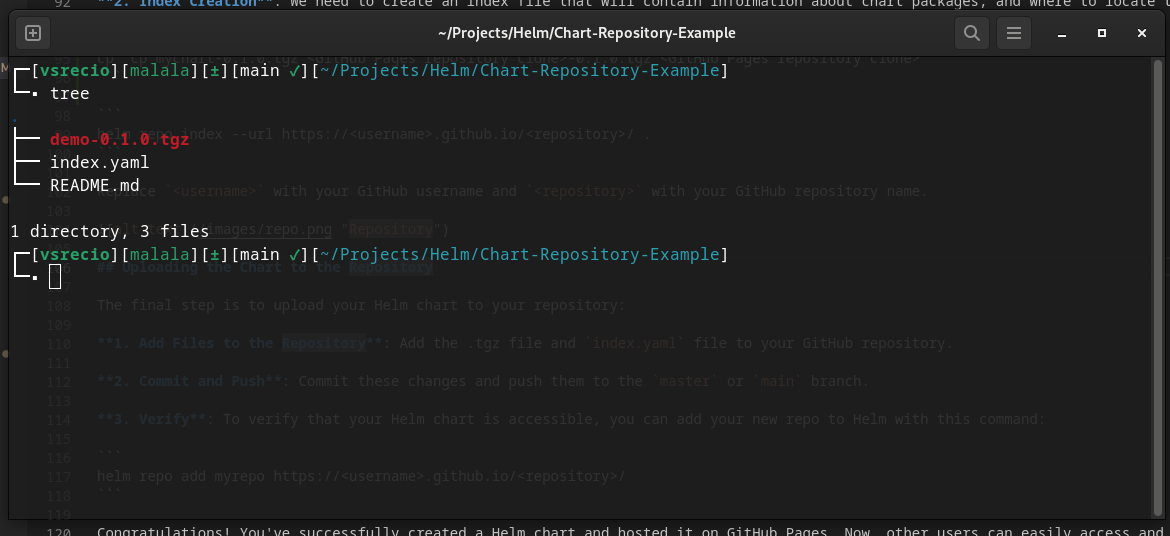
- Helm charts, packaged as .tgz archives
- An index.yaml file, containing metadata about the charts contained in the repository
Besides HTTP, the other type of repository a Helm chart maintainer can distribute charts to is an Open Container Initiative (OCI) registry. OCI is an open governance structure for creating open standards for container runtimes and formats. Artifacts is an OCI initiative that allows you to store and serve additional content, such as Helm charts, within container registries aside from container images. Since images and their registries are already a fundamental construct in both Kubernetes and Helm, the ability to leverage the same registry to store both container images and Helm charts reduces the amount of effort needed by Helm maintainers to publish charts. We will explore publishing Helm charts using OCI registries in greater detail in the Publishing to an OCI registry section. In the next section, we’ll publish our Guestbook Helm chart to GitHub Pages. Here, you will get an understanding of how a basic Helm chart repository is created and interacted with.
This content block was created using the book Managing Kubernetes Resources Using Helm!!
Creating a Helm Chart
Let’s start with creating a Helm chart:
1. Installation: First, you need to have Helm installed. If you haven’t done so yet, you can find the instructions here.
2. Chart Creation: Now, let’s create a basic chart with the following command:
helm create mychart
This will generate a directory with the necessary files to create a Helm chart.
3. Customization: Inside the mychart directory, you’ll find several YAML files that you can modify according to your application requirements. For instance, the values.yaml file is where you specify the default configuration values, while Chart.yaml contains metadata about the chart itself.
Creating GitHub Pages
Now, let’s create the GitHub Pages:
You can use GitHub Pages to showcase some open source projects, host a blog, or even share your résumé. This guide will help get you started on creating your next website. Link text Here
Publishing the the chart
Publishing a Helm chart to an HTTP repository consists of a three-step process:
- Packaging the Helm chart as a .tgz archive
- Generating an index.yaml file
- Uploading the .tgz archive and the index.yaml file to the server
First, you can use the helm package command to package your chart into a .tgz archive and update dependencies be necessary. After setting up GitHub Pages, it’s time to create the Helm package:
1. Chart Packaging: Go to your chart directory and use the following command to create a packaged chart:
helm dependency update mychart
helm package mychart --dependency-update
This command will create a .tgz file which includes all the necessary files to deploy your application.
2. Index Creation: We need to create an index file that will contain information about chart packages, and where to locate them. Use this command to generate it:
cp cp mychart-0.1.0.tgz <GitHub Pages repository clone>-0.1.0.tgz <GitHub Pages repository clone>
helm repo index --url https://<username>.github.io/<repository>/ .
Replace <username> with your GitHub username and <repository> with your GitHub repository name.

Uploading the Chart to the Repository
The final step is to upload your Helm chart to your repository:

1. Add Files to the Repository: Add the .tgz file and index.yaml file to your GitHub repository.
2. Commit and Push: Commit these changes and push them to the master or main branch.
git add .
git commit -m "Chart"
git push origin main
3. Verify: To verify that your Helm chart is accessible, you can add your new repo to Helm with this command:
helm repo add myrepo https://<username>.github.io/<repository>/
Congratulations! You’ve successfully created a Helm chart and hosted it on GitHub Pages. Now, other users can easily access and use your Helm chart by adding your Helm repository.
